I'm going to begin a new series of featured attackers and their specialty attacks from NRB. Up first is NRB elder, Marcx. Since he's joined NRB, he's impressed us with his GoHo skills and he graciously offered to write a GoHo tutorial for the blog. This tutorial is focused around TH8-9 attacks and hopefully you'll gain some new information that you can use to help your attacks as well.
Goho is one of the best and most consistent attacks that can be used in order to 3 star opponent bases during clan wars. A very effective strategy that works on practically any base ranging from the TH 8 to TH 9 levels. This attack helped me get rid of that “2-stars is good enough” mentality that I had before. This tutorial will give a large overview on the entire scouting, attacking and end process of the GoHo. This is based mostly on my personal experience and does not mean that it is the “Ultimate GoHo Tutorial” nor will it guarantee success right away. This is a guide that can be used to help you improve YOUR GoHo strategy(ies). Without further ado, let’s dive in.
Scouting
So, the most important part of GoHo is the scouting process. Because you are planning to get 3 stars and nothing less, you have to account for all possibilities of the base. No more, “I’m sending everything I got through that hole to hit the town hall and we’ll see how the rest goes”. You have to have a specific plan and be able to execute exactly how you thought it through. You also have to be able to improvise on the fly if ever you misgauged something to be able to recover and still achieve your goal. Don’t get me wrong, some bases will be very well made and can need a 2nd or even 3rd hit to be taken down. However, the better you scout, the better you’ll be at consistently getting those 3 stars on the first try.
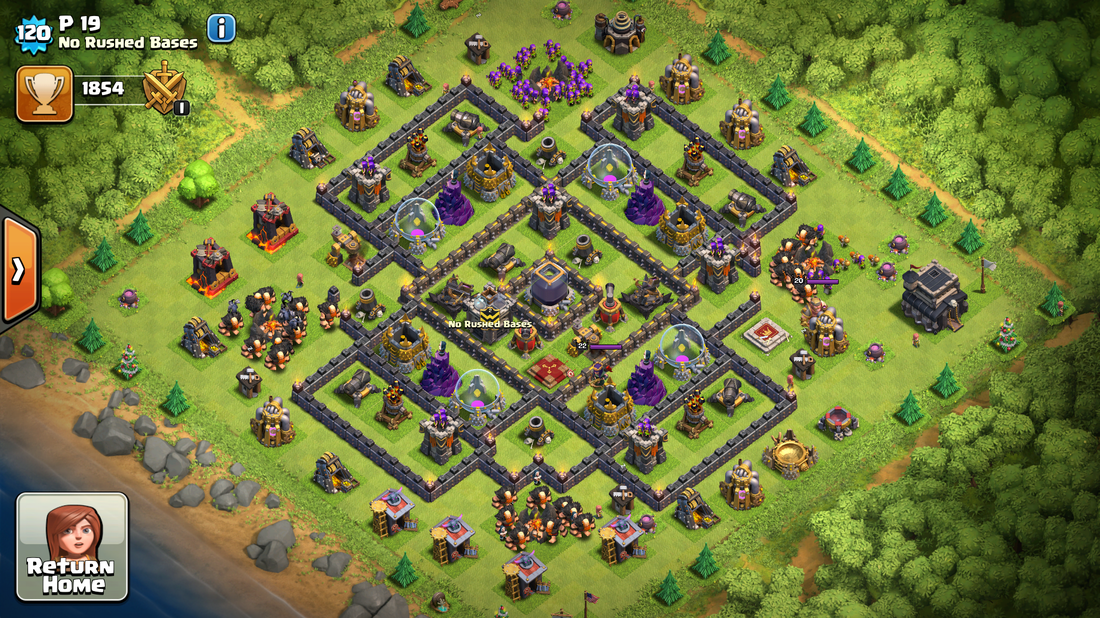
Step 1: Can the base be GoHo'd?
You can go over this with clan members, usually the majority of bases can be taken down with GoHo. The other strategies I like to use are GoVaHo and GoVaLo. I will show you the types of bases I would rather GoVa then GoHo.
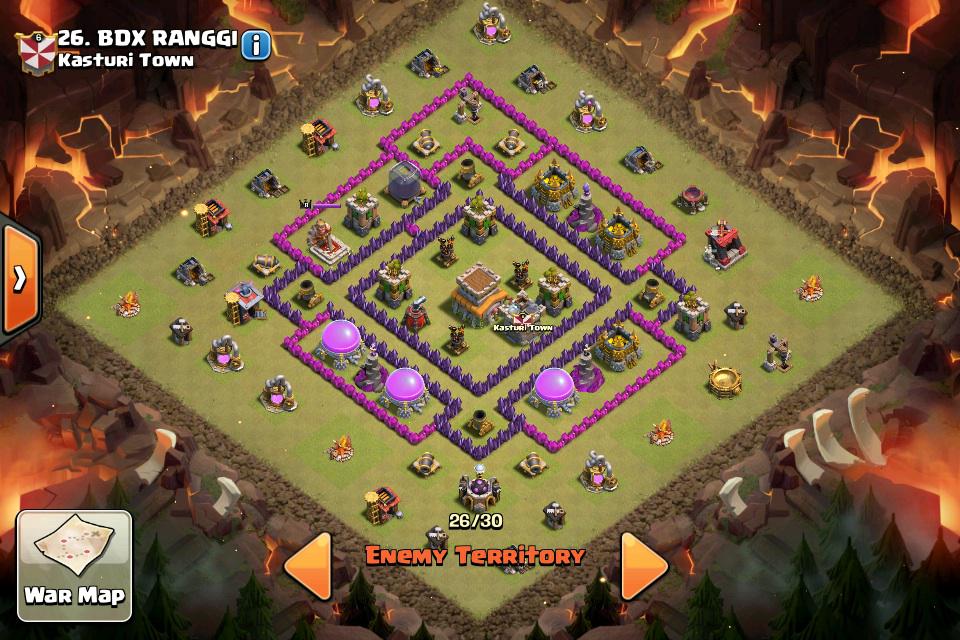
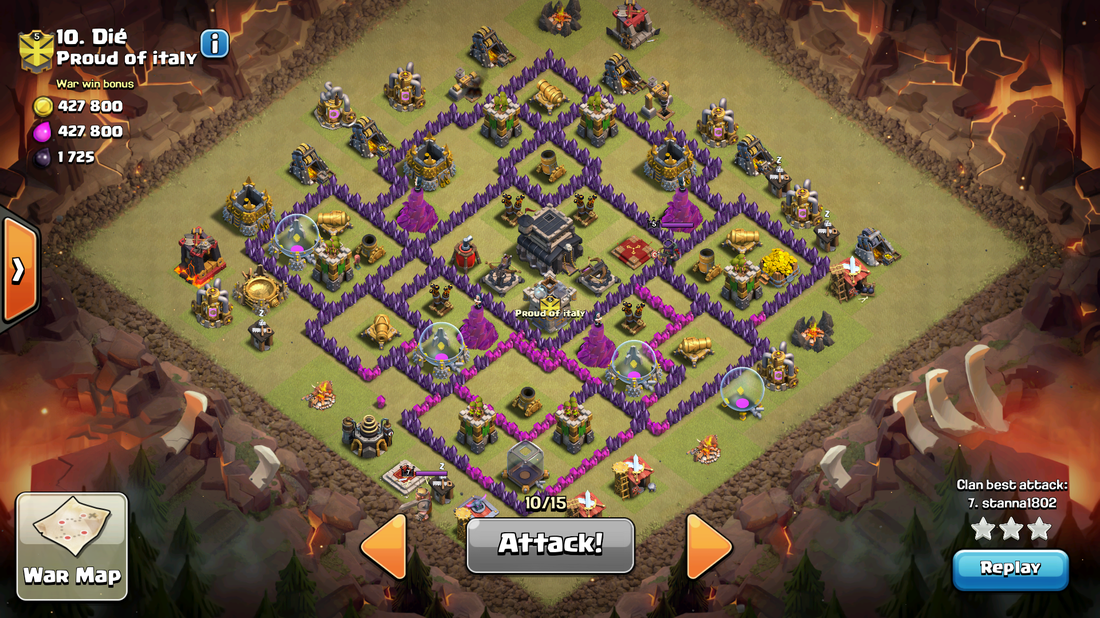
GoVaLo(Ho) friendly base
You typically find these bases at the TH8 Level because of the dragon attacks that happen frequently. All their AD’s are in the middle with a square protection around it and then most ground targeting defenses are on the outer ring of the base. The base is asking to get rushed through the middle and then cleaned up on the back end with loons or hogs targeting the remaining ground targeting defenses.
A GoVaHo friendly base would basically look the same except have DGB spots possibilities in the centre. More like the first of the two pictures above. The reason why you use valks is to get rid of the pathing towards the middle and eliminate the DGB’s.
Most other bases can be taken care of with GoHo but if ever you aren’t sure, just ask the Co’s.
Step 2: Check for DGB(s) and Tesla locations
 | Look at the spots that make sense to you on a base. There will be a video that I will make to explain more clearly on where it would make sense and wouldn’t make sense for DGB’s to be. It will help you round out where the Tesla’s will be and give you a good view on the pathing that your hogs will take around the base. It is very important to decipher where these spots are. They will be the deciding factor as to how you should drop your hogs. We will get into that later. |
Step 3: Check for AQ (TH9)/Where am I entering from?
You can ignore this for now if you are a TH8 planning to GoHo. The King is not the biggest threat, however, if you can take him out early, it is always a plus to your attack. TH8’s, however, can benefit by entering through the side they feel holds a DGB. Your Golems can tank that and your hogs will be living life just smashing defenses without any worries of getting blown up.
For TH9’s, the Enemy Queen is very important to the success or failure of the attack. 99% of the time you will have to enter the base through the side of the Enemy Queen in order to take her out before the second part of your attack begins or else she’ll take out your hogs one by one. And that my friends, is not cool…
For TH9’s, the Enemy Queen is very important to the success or failure of the attack. 99% of the time you will have to enter the base through the side of the Enemy Queen in order to take her out before the second part of your attack begins or else she’ll take out your hogs one by one. And that my friends, is not cool…
Step 4: Hog Drops (Surgical, one finger, two finger)
How do you plan on dropping your hogs? It is an important part of the attack, however, there's no one way to do it so go with your preference and what you feel comfortable with. I personally believe that dropping hogs surgically is the best way to perform a GoHo or any Hog attack for that matter. To be able to drop surgically, you have to know your hogs, how many hits can they take and how will they path. If you're dropping surgically, you want to go in a clockwise or counterclockwise motion. You might also want to bring a Giant or 2 to shield your hogs from defenses. I will show this all in a video also. Practice, practice, practice… Sometimes I’ll go attack the Goblins in campaign with a few hogs to see how many it takes to take out a certain defense while getting hit by other defenses. This helps gauge what they can take especially when taking out defenses to conduct a CC lure.
Step 5: Heal placement
Where do you plan on dropping your heals? Try and plan on dropping them close to areas that encompass defenses (especially splash) as well as those empty spots where you suspect there to be a GB. Always drop them before the Hogs get to that designated spot ie. lead your hogs INTO a heal. Planning is key because those heal spells and their placement are a big factor to your success.
Step 6: Cleanup
Be patient on the wizard drop…Wizards are strong and you don’t need millions of them to clear trash buildings to get your attack going. Drop them while they are being shielded by Golems to create the funnel, but always save one or two or say it be archers if that is your composition. You will want to place them on the edges that might need some extra help getting cleaned up while the end of the attack is underway. Don’t look past the cleanup, always save at least 1-2 wizard(s) for the end.
Attacking
Part 1: CC Lure
I always Lure; 99% of the time. You can be successful without doing the lure, but I personally almost always lure. It is a safer method that can avoid certain mishaps during the attack that would be possible if the CC troops just handled their stuff better than yours do.
Technique 1: Lure with a Giant or Hog
Since most CC’s hold 1 Dragon and Loons now, it is very easy to lure with one hog but the safest bet if you are uncertain of what they have in their CC is a Giant since his HP will hold on long enough to pull out all CC Troops.
Technique 2: Lure by destroying Defenses
I love to lure like this for a few reasons. However, it isn’t always the best way to lure so don’t always try and do it. The base will dictate the lure. Taking out defenses- especially point defenses such as cannons, archer towers or x-bows is preferable because you can:
- Initiate a Tesla to confirm its placement
- Get rid of GB’s or badly placed DGB’s
- Adjust the Pathing of your hogs to improve your overall raid.
Part 2: CC Kill
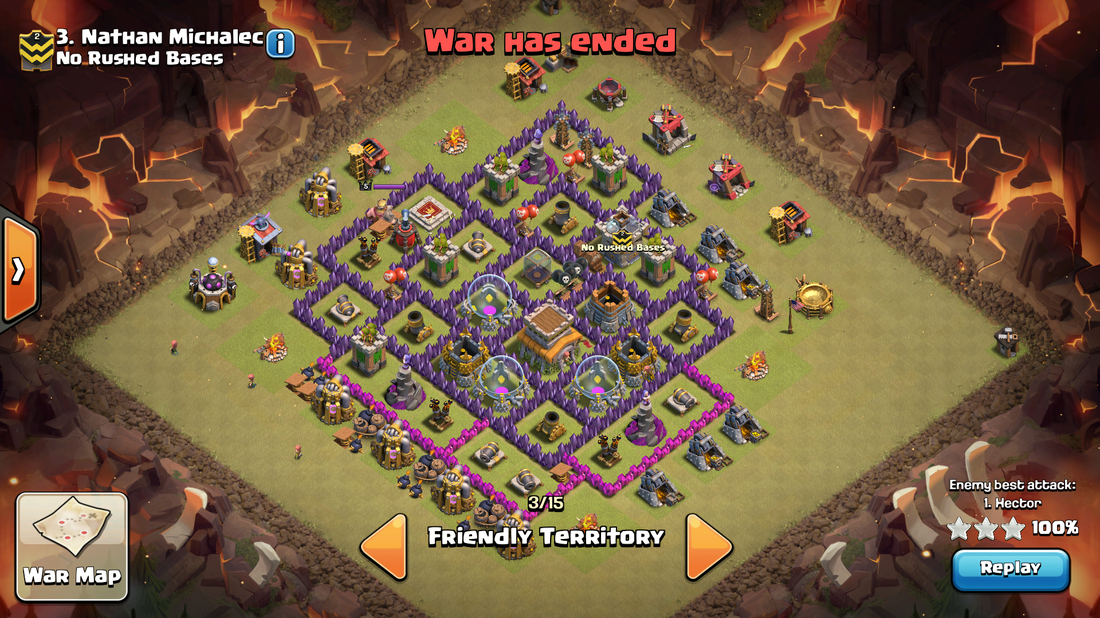
Powerbang Gaming shows a very efficient way to kill a CC dragon.
- You can also kill the CC with Witches as they are really effective in distracting the troops.
- The CC Kill has to be efficient. You don’t want to spend 8 Wizards trying to take out a dragon, it just won’t cut it so practice on staying calm when handling the CC and taking it out cleanly.
- Make sure to kill the CC in the same spot that you will enter the base so as to drop your Golems right after the CC is dealt with or just before they get killed to cover those troops that will be moving towards the base and into the line of fire. You don’t want to waste any troops.
Part 3: Kill Squad
Your Kill Squad is the first group of your army, normally consisting of a Golem, Wizards, Heroes, Wallbreakers and Witches in some cases. Again, it all depends on preference and how you like to handle your GoHo.
TH8 Entrance
You want to enter by the sides that seem to show the possible spots of where there could be GB’s or DGB’s in order to rid yourself of them before the second phase of your attack kicks in. Its also great if you can get in and kill the King while you enter the base.
Always bring more wallbreakers than less. 8 wallbreakers was my magic number at TH8 and still is at TH9.
Spell options are varied for the TH8 GoHo and depend on personal preference as well as base layout.
Option 1: Rage Spell
Once the CC troops are dealt with, drop your golems. You want to spread them not too wide but not too close so that they can engulf the oppositions defense while your wizards are clearing the path, aka funneling, to enter the base through the spot you want to penetrate. Drop your rage spell in the middle of your 2 golems, raging them up slightly also. The spell should be slightly outside of the base but more towards the interior of it so that the rage spell continues on within the base as your troops go deeper.
Start dropping your WB's in pairs. Raged up WB’s make a mess out of walls so use that rage when entering the base to give it a warm welcome and get your troops as deep in as possible. Follow up with your Hero(es) and your CC (if you have a Pekka or Witches) once the funneling is made to have them head towards the interior and drop a few wizards in behind while keeping 1 or 2 for cleanup.
Option 2: Earthquake Spell
Attacking with the Earthquake Spell is important to understand because there are times where WB’s won't cut it if you want to funnel correctly and get your troops where you want them to be. You have to recognize that by understanding how WB’s target their walls. If it happens to be favourable then do it, your hogs can survive if deployed properly with no problem while only having 1 heal. WB’s are not excluded from this technique since sometimes you need 1-3 to open up the first compartment of walls in order to get inside.
TH9 Entrance
Enter with the same standards as a TH8, however, you also want to be able to take the Archer Queen out. From there, you can figure out which spot will be best to enter from. (Refer to TH8 explanations)
Spell options are bit more varied at TH9 with the addition of the jump spell and the extra spell space over TH8.
Option 1: Rage Spell
Very similar to the TH8 Entrance if you decide to enter with Rage Spell at TH9, just add the Queen to the equation.
Option 2: Earthquake Spell
Very similar to the TH8 Entrance if you decide to enter with EQ Spell at TH9, just add the Queen to the Equation and make sure to drop your 2 heal spells at the right spot. based on the pathing that you are expecting from the scout you did. WB’s are not excluded from this strategy since sometimes you need 1-3 to open up the first compartment of walls in order to get inside.
Option 3: Jump Spell
Entering the base with a Jump Spell is much more effective when you have higher level heroes (20+). The plan stays the same, create your funnel and kill the queen before engaging your hog drop. I also suggest only using the Jump Spell at Level 2 for this attack.
Part 4: Hog Drop
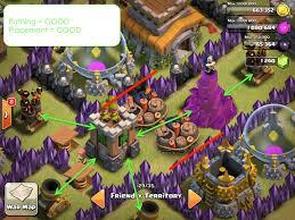
Now it’s time for the hog deployment, don’t wait too late nor too early. You will get the feel of when to let them go after a couple attempts at the attack and it will become natural at one point. You want to follow your plan and deploy how you planned to deploy. In my case, it usually is surgically to avoid pathing to DGB’s. I send 3 to 4 Hogs per defense as I make a circle around the base but I do it slowly and patiently to help the other hogs catch up to the new ones that have just been deployed. I try to drop my hogs adjacent to where my kill squad is and just circle from there. Then I drop my heal and I continue around the base slowly, sometimes dropping a giant in before dropping my hogs. As long as you predicted the proper pathing, you should be in good shape. At TH8, I liked to drop my CC Hogs in last to finish off the last defenses of the base. That plan worked very well.
Your deployment skills will improve and at one point you’ll be very comfortable with deploying your hogs and that's when this attack becomes extremely fun. Once you settle into it, you’re bound to want to stick to it. We have guys who prefer two finger drops and sometimes one finger drops although I do not like the one finger drop seeing as your hogs will either make it or break it all together if they land on a DGB. I like spreading them out, keeping them shielded with giants and surgically wiping out the base. I strongly suggest learning how to deploy surgically but it is not a requirement. You will feel more in control of your attack. Keeping a poison spell to drop on the king or skeleton traps is always a plus if you’re able to take out the CC without poison.
Your deployment skills will improve and at one point you’ll be very comfortable with deploying your hogs and that's when this attack becomes extremely fun. Once you settle into it, you’re bound to want to stick to it. We have guys who prefer two finger drops and sometimes one finger drops although I do not like the one finger drop seeing as your hogs will either make it or break it all together if they land on a DGB. I like spreading them out, keeping them shielded with giants and surgically wiping out the base. I strongly suggest learning how to deploy surgically but it is not a requirement. You will feel more in control of your attack. Keeping a poison spell to drop on the king or skeleton traps is always a plus if you’re able to take out the CC without poison.
Powerbang Gaming Surgical Hogs Showcase
Part 5: Cleanup
The final part of the attack is pretty straight forward. Once you’ve dropped your last heal spell, you have to realize that the rest of the attack is in the hands of your hogs. Since you can’t control that anymore, look to your remaining wizards, archers or even goblins (2x damage on resource buildings which is usually what’s left so don’t think its wrong to bring goblins to a gunfight). Drop them in spots where your hogs won’t be around for a while so they can start cleaning up and get the attack over with before the time expires.
Part 6: Celebrate and/or Improve
Watch your attacks, whether you 3 starred or didn’t to know what you could have done to improve. Could the CC kill have been done cleaner? Could my hog deployment have been better? Could my Heal placement been better? Could my entry have been better? Asking yourself those questions, watching other GoHo’s and wanting to learn and improve is the biggest key to being consistent at this attack. Just don’t give up on it, it takes time just like anything else.
Troop Compositions
Troop compositions can vary so do not rely on this as the correct composition to do each attack. You can bring Loons, a Pekka, Witches, a 3rd Golem…and the attack will still be viable. That’s what’s great about it: the principle stays the same but it can be customized to your liking based on the base you’re facing and what you’re comfortable with.
Here are a few of my Troop Compositions for TH8 and TH9 based on my preference and Spell Selection:
Here are a few of my Troop Compositions for TH8 and TH9 based on my preference and Spell Selection:
TH8:
Troops:
2 Golems (60)
10 Wiz (40) (Lvl 5)
8 WB’s (16) (Lvl 5)
16 Hogs (80) (Lvl 4)
1 Archer* (1)
3 Barbarians* (3)
BK (Lvl 10 preferably)
CC: 5 Hogs (Lvl 5)
Spells:
1x Rage (Lvl 5 preferably)
2x Heal (Lvl 5)
1-2x Poison
*Archer/barbs are used to bring the CC troops to the area in which you want to take them out from.
TH9:
Troops:
1 Golem (30)
10 Wiz (40) (Lvl 5)
8 WB’s (16) (Lvl 5)
24-26 Hogs (130) (Lvl 5 preferably)
0-2 Giants (0-10) (Lvl 5+)
1 Archer* (1)
3 Barbarians**(3)
BK (Lvl 10+)
AQ (Lvl 5+ preferably)
CC: 1 Golem (Lvl 5)
Spells:
1x Rage (Lvl 5) or 1x Jump (Lvl 2)
3x Heal (Lvl 6 preferably)
1-2x Poison
Troops:
2 Golems (60)
9 Wiz (36) (Lvl 5)
0-8 WB’s (0-16) (Lvl 5)
21-24 Hogs (105) (Lvl 5)
0-3 Giants (0-15) (Lvl 5+)
1 Archer* (1)
3 Barbarians**(3)
BK (Lvl 10+)
AQ (Lvl 5+ preferably)
CC: 1 Golem (Lvl 5)
Spells:
4x EQ or Rage or Jump
2-3x Heal (Lvl 6 preferably)
1-2x Poison
** Barbarians are used to distract CC Dragon, as shown in the video on how to effectively kill a CC Dragon
Troops:
1 Golem (30)
10 Wiz (40) (Lvl 5)
8 WB’s (16) (Lvl 5)
24-26 Hogs (130) (Lvl 5 preferably)
0-2 Giants (0-10) (Lvl 5+)
1 Archer* (1)
3 Barbarians**(3)
BK (Lvl 10+)
AQ (Lvl 5+ preferably)
CC: 1 Golem (Lvl 5)
Spells:
1x Rage (Lvl 5) or 1x Jump (Lvl 2)
3x Heal (Lvl 6 preferably)
1-2x Poison
Troops:
2 Golems (60)
9 Wiz (36) (Lvl 5)
0-8 WB’s (0-16) (Lvl 5)
21-24 Hogs (105) (Lvl 5)
0-3 Giants (0-15) (Lvl 5+)
1 Archer* (1)
3 Barbarians**(3)
BK (Lvl 10+)
AQ (Lvl 5+ preferably)
CC: 1 Golem (Lvl 5)
Spells:
4x EQ or Rage or Jump
2-3x Heal (Lvl 6 preferably)
1-2x Poison
** Barbarians are used to distract CC Dragon, as shown in the video on how to effectively kill a CC Dragon
TH9 GoHo using Rage
TH9 GoHo using Earthquake
TH9 GoHo using Jump and great lure
TH8 GoHo using Rage and good lure
TH8 GoHo using earthquake
Thanks for reading! If you have any questions or find something I didn't touch on, email us at [email protected].


 RSS Feed
